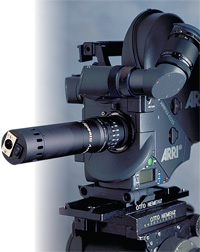
By Graham Jones, Sydney Technical Services Manager (Film).

FOR 16MM:
- You will need to workout how much film will be needed, how many speeds you will run at say 24/25, 50,75 and then high speeds such as 100, 125,150. For each speed you should run between 10 to 20 feet.
- Set up the camera on a tripod or bench or even the floor, the Century unit is not affected by movement as the tester and camera are one.
- Once the camera is loaded with film and timecode (if being used) ID the first run. NOTE: Turn the tester 180 degrees so the markings are away from you , this will become apparent latter.
- Attach the steady tester, turn it on and check through the viewfinder that the grid pattern is square with the frame lines.
- Check the camera speed to the ASA on the tester is correct.
- You are ready to start- make sure the eyepiece is closed or blacked out and tester is switched on.
- Run the camera for the entire length (say 60 ft) at a base speed of 25 fps. Use more film if more speeds are needed.
- Unload magazine, rewind the film and reload.
- Almost ready to start again but you must rotate the tester back 180 degrees so the markings are now towards you.
- Again check that the grid lines are square to the frame lines.
- ### Done this way you will have a neat pattern of squares to look at when projected or on the telecine .
- Turn the unit on and run the camera again at your first speed of 25 fps. After 10-20 feet, stop the camera so you can ID a speed change (eg. 50 fps).
- Adjust the speed to ASA on the tester and shoot your next speed , repeat the process over until all desired speeds are done.
- Congratulations you have almost finished , just unload the magazine take it to the lab.
HINT: to remove any errors do not have a work print done just ask for a " process only " on the steadytest as this removes any possible questions.
FOR 35MM:
- You will need to mark at least the first 6 frames of film with a marker pen to allow you align the frames correctly on the second pass.
- This needs to be don't through the lens port and camera inched by hand.
- On the second pass the frame can be aligned correctly.
- Other than this it is the same procedure.
- When viewing tests ask to see the top or bottom frame line, this can also be an indicator if movement is detected.